Paver Locking Sand: Joint Depth and Dry Times
Learn how to apply paver locking sand: depth rules, coverage per bag, dry times, wetting steps, and when plain sand is sufficient.
Data checked November 2026 · Sources: manufacturer technical data sheets; ASTM unit specifications; ICPI/CMHA installation guidance; local building and stormwater offices ·Methodology →
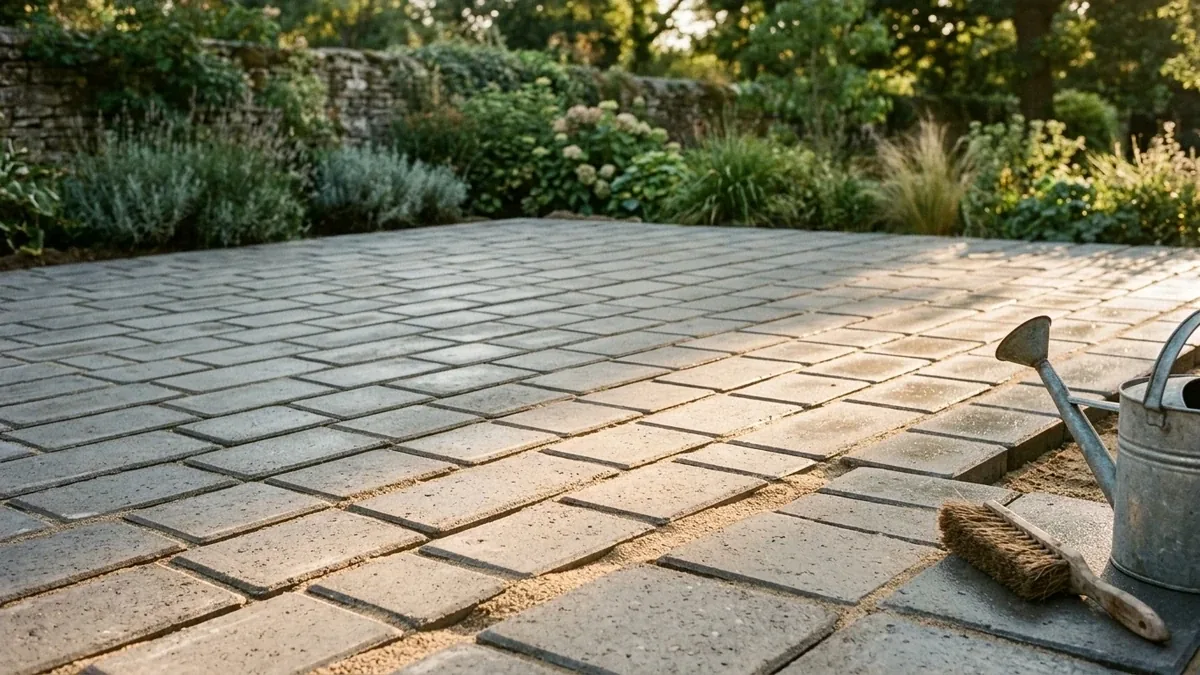
Paver locking sand is a polymeric joint material that sets firm after activation with water. Recess the sand at least 3 mm (1/8 in) below the paver chamfer, sweep completely clean, and hydrate in two passes. Keep the installation dry for about 24 hours.
- Joint depth
- At least 3 mm (1/8 in) below top
- Rain protection
- About 24 hours dry window
- Foot traffic
- After 24 hours
- Vehicle traffic
- 24-48 hours
Some links on this page are affiliate links.If you buy through them we may earn a commission at no extra cost to you. We do not accept payment for rankings. Read the full disclosure.
| Locking sand | Plain sand | |
|---|---|---|
| Material structure | Graded sand with polymer binder | Unbound washed sand |
| Final state | Sets flexible and firm | Stays loose |
| Rain resistance | Resists erosion once set | Erodes on slopes and edges |
| Maintenance | Remove and replace damaged sections | Requires regular topping up |
| Recommended use | Driveways, sloped surfaces, patios | Sheltered, flat garden paths |
Paver locking sand is a specialized joint-filling material blended with dry polymeric additives that activate upon contact with water. Once saturated and dried, it forms an elastomeric matrix that locks adjacent pavers together while resisting wash-out from wind and rainfall. Applying this material demands strict timing, precise surface preparation, and correct moisture control. Overlooking basic guidelines can leave persistent stains across stone faces or lead to loose, eroded joints within weeks.
What makes locking sand different from plain sand
Polymeric locking sand combines graded sand particles with an activating binder that hardens into a flexible joint after watering. Unlike loose masonry sand that washes out on slopes and drifts under foot traffic, this material forms an elastomeric bond between pavers, preventing erosion while accommodating subtle pavement shifts.
Traditional jointing aggregate consists entirely of washed quarry sand. While it fills the narrow voids between blocks, it offers no adhesive properties. Heavy rain, garden sprayers, and regular sweeping steadily strip loose grains from the gaps. This continuous erosion removes the lateral friction that holds pavers upright under vehicular and pedestrian movement.
Locking sand introduces chemical polymers that coat the sand grains and coalesce into a resilient plug when wetted. The hardened material remains flexible rather than brittle. That flexibility allows joints to absorb environmental expansion without fracturing, preserving structural interlock without deteriorating like rigid mortar.
When to choose plain joint sand instead
Plain sand remains appropriate for sheltered, level walkways that experience minimal surface water runoff and low pedestrian activity. Because unstabilized sand stays loose, it washes away on sloped surfaces, requiring regular sweeping and replenishment, whereas polymeric material locks firmly in place across exposed driveways and high-traffic outdoor living areas.
Homeowners working on covered porches or flat garden pathways often select washed sand to simplify future alterations. If an underground utility line requires excavation, dry masonry sand vacuums out effortlessly. Removing polymeric sand, by contrast, demands mechanical scraping or high-temperature pressure extraction.
| Joint Feature | Polymeric Sand | Plain Masonry Sand |
|---|---|---|
| Material composition | Sand with activating polymer binder | Washed mineral sand without additives |
| Finished consistency | Sets into a firm, flexible joint | Remains permanently loose |
| Erosion resistance | Resists rain wash-out once set | Erodes on slopes and open edges |
| Maintenance cycle | Localized joint extraction and refilling | Periodic sweeping and topping up |
| Primary application | Driveways, sloped surfaces, open patios | Sheltered walkways and temporary pavers |
Evaluating site exposure dictates the right selection. High-exposure surfaces, driveways, and locations subjected to regular hose washing or wind demand locked joints. Sheltered paths with tight interlocks function adequately with plain sand, provided homeowners accept periodic topping up.
The 3 mm joint depth rule
Paver sand should rest at least 3 mm (1/8 in) below the surface edge or along the bottom border of the paver chamfer. Leaving this gap keeps the sand from transferring onto shoes, protects adjacent paver borders from chipping under lateral contact, and prevents water from scouring loose surface grains.
Filling joints flush with the upper paver face creates chronic maintenance headaches. The top millimeter of sand quickly breaks away under foot traffic, grinding across the paver finish and scratching protective sealers.
Recessing the joint creates an essential mechanical reveal. Concrete pavers feature manufactured bevels or rounded chamfers designed to channel surface runoff away from direct tire and shoe contact. Terminating the sand at least 3 mm (1/8 in) below the top or at the chamfer base protects the hardened binder from abrasive traffic forces. It also prevents loose grains from sticking to footwear and tracking indoors.
Surface drying requirements and rain protection
Installers should confirm the forecast shows about 24 hours without rain before spreading joint material across the site. While the binder must dry at least 90 minutes before moisture exposure, complete hardening requires roughly 24 hours before foot traffic and 24 to 48 hours before vehicle access is permitted.
Atmospheric moisture dictates installation success. Spreading polymer-blended sand across wet pavers causes instantaneous surface activation. The dissolved polymers cling to stone pores, leaving an unsightly haze that resists rinsing. Paver surfaces, joint crevices, and bedding layers must dry thoroughly before application.
While product data shows the sand must dry at least 90 minutes before water exposure, heavy rain can dilute the stabilizing binder. Rainstorms wash liquefied polymer out of the joints, leaving hollow voids beneath. Planning for about 24 hours without rain avoids failure.
Keep foot traffic off for 24 hours, and wait 24 to 48 hours before parking vehicles. Premature loads displace partially dried joints, breaking polymer bonds before they achieve structural cohesion.
Estimating coverage per bag on project layouts
A single bag covers about 50 sq ft of pavement when joints are constructed at standard dimensions. Project planners must add 10-15% extra material to account for wide joints and site waste, ensuring enough product remains on hand to finish the surface uniformly without color variations across batches.
Joint dimensions dictate actual sand consumption far more than surface area alone. Narrow joint spacing requires minimal aggregate, whereas wide joints consume substantial volume. Deep block profiles also require noticeably more sand per square foot than shallow pedestrian patio pavers.
Adding 10-15% for waste and joint variances prevents running short mid-installation. Halting work to buy another bag risks weather delays that compromise uncompacted sections. Purchasing all bags together also ensures uniform aggregate blending and color consistency across the entire paved area.
The two-pass watering protocol
Watering requires two passes across small sections using a light spray nozzle, stopping immediately before surface runoff occurs. This controlled soaking drives moisture through the entire joint depth, ensuring the polymer activates evenly from bottom to top rather than creating a thin crust over dry, loose grains beneath.
Proper activation demands careful moisture control. Blasting joints with high pressure dislodges sand grains, while misting too lightly hydrates only the surface. Follow this systematic activation sequence:
- Confirm that pavers and joints are dry, and verify sand sits at least 3 mm (1/8 in) below the chamfer.
- Blow all stray sand dust completely off the paver faces before introducing water.
- Set the hose nozzle to a gentle shower spray, focusing on a manageable section.
- Complete the first wetting pass evenly across the section, stopping before runoff begins.
- Allow water to soak downward for several seconds, then complete the second wetting pass.
- Protect the area from foot traffic for 24 hours and vehicles for 24 to 48 hours.
Working in small zones keeps the sand from drying out between passes. Never allow pooled water to run across the surface, as runoff carries active polymers away and deposits haze across paver faces.
Four common installation mistakes that cause callbacks
Four critical mistakes trigger early joint breakdown: applying sand to damp pavers, overfilling joints past the chamfer, rushing through a single watering pass, and exposing fresh material to premature rainfall. Avoiding these oversights prevents stubborn surface stains, binder wash-out, and soft voids hidden below the top edge.
Applying material over morning dew or damp pavers binds polymers to the surface, generating persistent haze. Leaving sand above the 3 mm (1/8 in) recess causes traffic to kick loose grains across the patio.
A single hurried wetting pass leaves dry sand at the base, resulting in a fragile crust that collapses under foot traffic. Finally, ignoring rain forecasts washes out the binder, ruining joint cohesion. Meticulous timing and two careful wetting passes avoid these costly callbacks.
Persistent joint separation and base stability
When joint sand repeatedly cracks, vanishes, or separates despite correct application methods, the underlying gravel foundation or water management system has failed. Joint material provides lateral friction between units, but shifting pavers, sinking sections, or expanding gaps signify structural bedding movement that no replacement sand can permanently stabilize.
Joint sand cannot compensate for inadequate base compaction or poor subgrade drainage. When a gravel foundation settles under vehicular weight or erodes from subsurface water flow, adjacent pavers rotate and drift apart. That widening movement pulls the joint open, tearing the flexible polymer plug apart.
Contractors often encounter clients who repeatedly refill opening joints, mistaking a foundation failure for poor sand quality. If individual pavers rock underfoot or surface depressions collect standing water, the subgrade has moved. Remedying this condition requires lifting the pavers, correcting subgrade grading, and executing proper paver base preparation before re-installing fresh joint sand.
Polymeric joint sand provides essential interlock and erosion resistance when placed over a stable, properly sloped foundation. For routine washing and seasonal care, follow our recommendations for paver patio maintenance. If organic growth emerges in shaded areas despite stabilized joints, consult our methods for weeds in joints prevention to keep the pavement clean, durable, and structurally sound year after year.
How to do it
- Confirm weather windowVerify the surface is dry and plan for about 24 hours without rainfall.
- Clear the jointsRemove debris and loose material, allowing the pavement to dry fully.
- Sweep sand into jointsSpread the material across dry pavers and pack it down between units.
- Recess below chamferKeep sand at least 3 mm (1/8 in) below the top paver edge and blow off excess.
- Water in two passesApply a light spray across small sections in two passes, stopping before runoff.
- Allow full dry timeWait 24 hours before foot traffic and 24-48 hours before vehicle parking.
Frequently asked questions
Do I need locking sand for pavers?
Not on every layout, but it is standard for sloped patios and driveways exposed to weather. Polymeric sand locks the joints, limits wash-out, and slows weeds. Plain sand remains acceptable only on flat, sheltered walkways where loose joints are simple to refill.
How long does paver sand take to dry?
Plan for about 24 hours without rain after wetting. The binder must dry at least 90 minutes before water exposure, but heavy downpours during the first day can ruin the joint. Keep foot traffic off for 24 hours and vehicles off for 24-48 hours.
How deep should sand sit in paver joints?
The sand level must sit at least 3 mm (1/8 in) below the top of the paver or at the bottom of the chamfer. Filling flush causes granules to scuff onto the surface, track into homes, and wear down prematurely under regular foot traffic.
Can polymeric sand be applied to wet pavers?
No. The pavers and joint spaces must be completely dry before sweeping in sand. Any residual moisture activates the polymer binder prematurely, causing stubborn surface staining, haze across the stone, and incomplete setting deep inside the joint.
How many watering passes are required?
Water in two passes in small sections using a light shower nozzle, stopping before runoff occurs. This process activates the binder throughout the entire profile. Stopping before runoff prevents polymer from washing out and leaving a film.
Why do my paver joints keep opening up?
Joints that keep opening point to a base or drainage failure, not the sand. When gravel sub-bases shift, settle, or wash out from excess moisture, pavers spread apart laterally, fracturing the joint sand regardless of product quality.
Sources
Some links are affiliate links.If you buy through them we may earn a commission at no extra cost to you. We do not accept payment for rankings. Read the full disclosure.