Concrete Pavers Installation: Step by Step
Concrete pavers installation runs from excavation and compacted base to bedding, laying, cutting, and joint sand. See the sequence, tools, and cost math.
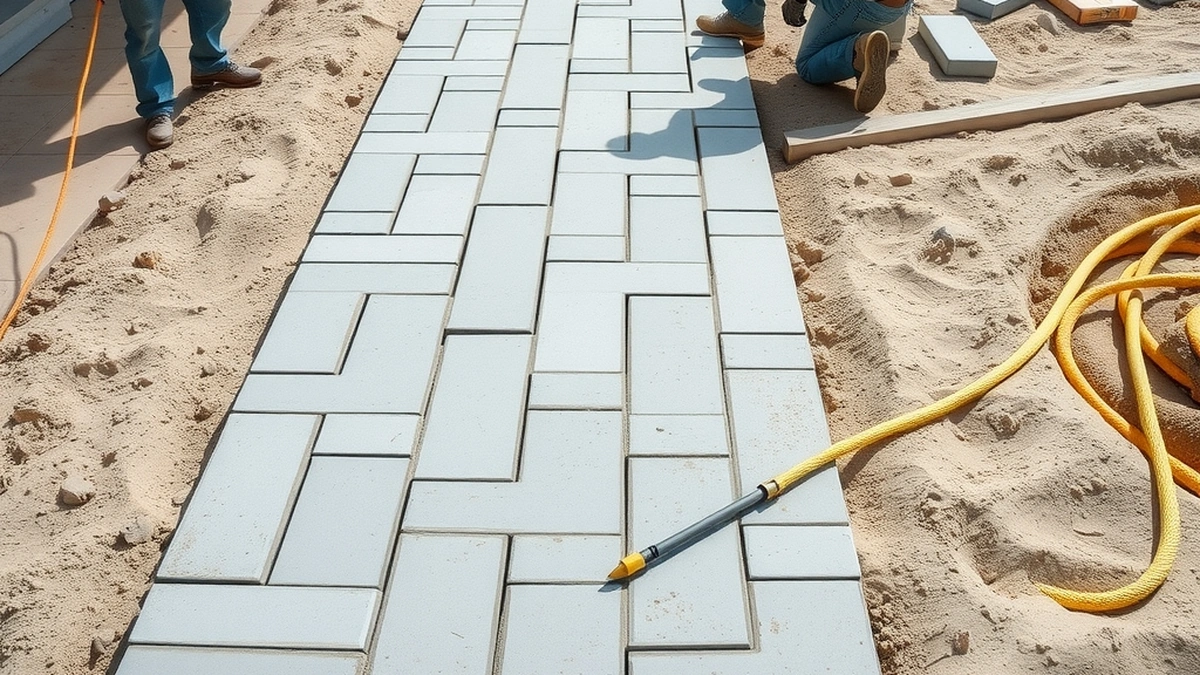
Concrete pavers installation is a fixed sequence: excavate, compact 4 to 6 inches of base, screed an inch of bedding sand, lay units from a string line, cut the edges, pin restraint, compact, and fill joints with sand. Skipping compaction or restraint shows up within a season.
- Time for 300 sq ft
- 2 - 4 working days
- Crew size
- 2 - 3 people
- Material waste
- 5 - 10 percent
- Weight per sq ft
- about 28 lb
- Installed cost
- $8 - $15 per sq ft
Some links on this page are affiliate links.If you buy through them we may earn a commission at no extra cost to you. We do not accept payment for rankings. Read the full disclosure.
Concrete pavers installation follows a sequence that does not change much between a 100-square-foot walkway and a 600-square-foot patio: excavate, build and compact the base, screed bedding sand, lay from a fixed line, cut the edges, pin restraint, compact, and sand the joints. Most of the labor is in the first three steps, and most of the failures come from rushing them.
What the Job Involves
Concrete pavers are molded units of cement, aggregate, and pigment, typically 60 mm thick for foot traffic and 80 mm for vehicles. They are not glued down. They sit on a sand bed over compacted aggregate, held tight by edge restraint and joint sand, and they work as a system rather than as individual tiles.
The installation has two halves. Below the surface is structural work: excavation, base, compaction, grade. Above it is finish work: pattern, cuts, restraint, joints. A crew that is fast at the second half and careless at the first produces a patio that looks correct on handover and is uneven by the next spring.
Tools and Materials
| Item | Purpose |
|---|---|
| Plate compactor | Compacts base lifts and the finished field |
| String lines and stakes | Sets line, level, and slope |
| Screed rail or straightedge | Levels bedding sand |
| Rubber mallet | Seats units without chipping |
| Wet saw with diamond blade | Clean cuts at edges and corners |
| Paver extractor or pry bar | Lifts units for adjustment |
| Edge restraint and spikes | Holds the perimeter |
| Joint sand | Locks units and fills joints |
A wheelbarrow, a shovel, and a hand tamper will not replace the plate compactor. Rental for a day is modest next to the cost of redoing a patio.
Layout and Pattern
Layout starts before any sand goes down. Set two string lines at right angles, check them with the 3-4-5 method, and establish the finished height against the house, the lawn, and any step.
Pattern choice affects both appearance and material:
- Running bond is the fastest to lay and wastes about 5 to 10 percent.
- Herringbone locks units against lateral movement, suits driveways, and wastes about 15 percent.
- Basketweave sits between the two and reads as a traditional surface.
- Stack bond looks orderly but has no interlock and is a poor choice under load.
For a 300-square-foot patio, add 5 to 10 percent: 300 × 1.05 = 315 square feet at the low end and 300 × 1.10 = 330 at the high end. Herringbone pushes that toward 345 square feet.
The Installation Sequence
- Excavate to the finished depth: paver thickness plus 1 inch of sand plus the compacted base depth.
- Compact the subgrade, then place aggregate in 2- to 3-inch lifts and compact each lift.
- Check grade and slope against string lines, with about 1 inch of fall per 4 feet away from the house.
- Screed bedding sand to a uniform 1 inch using rails or a straightedge.
- Lay the field from an established line, working away from it and checking joints every few rows.
- Cut the edges with a wet saw, keeping the cut line tight to the restraint.
- Install edge restraint and spike it into the compacted base, not the soil.
- Compact the field, sweep joint sand in, compact again, and top up the joints.
The base steps are covered in more detail in paver base preparation, including the aggregate specification and the compaction test.
Cutting and Edge Restraint
Cuts are where a DIY job looks DIY. A wet saw with a diamond blade produces clean edges; a hammer and chisel produces chips, and on a 60 mm unit the chips are visible from standing height.
Plan the layout so cuts land at the perimeter, where the restraint hides them, rather than through the middle of the field. On a curved border, mark each unit in place, number it, and cut to the mark.
Edge restraint is not optional. It is a plastic or aluminum channel pinned through the base every 8 to 12 inches, and it resists the outward creep that every paver field experiences under traffic. A patio without restraint spreads at the edges within a couple of seasons, and the joints behind the spread open.
Compaction, Sand, and Sealing
After laying, run the plate compactor over the field with a rubber pad or a thin sand cushion to protect the surface. Then sweep joint sand into the gaps, compact again, and repeat until the joints stay full.
Sealing is optional and separate. It runs $1 to $3 per square foot, or $300 to $900 on 300 square feet, and it is best done a season after installation so the units have dried and any efflorescence has appeared and been cleaned. The paver sealing cost guide covers timing and products.
Cost: DIY Versus Contractor
Concrete pavers cost $8 to $15 per square foot installed. On 300 square feet that is 300 × $8 = $2,400 to 300 × $15 = $4,500.
Doing the work yourself removes labor but not material:
- Pavers at roughly $3 to $6 per square foot: 300 × $3 = $900 to 300 × $6 = $1,800.
- Base aggregate, bedding sand, restraint, and joint sand: a few hundred dollars on a patio this size.
- Compactor rental, saw rental, and delivery: a few hundred more.
The realistic DIY saving is the labor line, which is the larger half of the installed price — but only if the base is built correctly. A redo costs $4 to $8 per square foot in base repair, 300 × $4 = $1,200 to 300 × $8 = $2,400, which erases the saving entirely. The DIY paver patio guide covers whether the work suits your site.
Timeline and What to Inspect
A 300-square-foot patio takes two to four working days: one day excavation and base, one day sand and laying, half a day cutting and restraint, half a day compaction and joints. Weather adds time, and so does poor access.
Before the crew leaves, check four things. The surface should shed water when you pour a bucket across it. Joints should be full and even. The edge should be tight against restraint with no gaps. And no unit should rock underfoot.
For the material side of the budget, see concrete pavers cost. For the broader patio sequence, including steps and borders, see paver patio installation.
Frequently asked questions
How long does concrete paver installation take?
Two to four working days for a 300-square-foot patio with a two- or three-person crew, assuming the base is built fresh and the site is accessible.
Can I install concrete pavers myself?
Yes, on a patio or walkway. The work is physical rather than technical, but base compaction and grade are unforgiving, and a plate compactor is not optional.
What is the best pattern for concrete pavers?
Running bond is the fastest and wastes the least. Herringbone locks better under vehicle traffic and looks older, but generates more cuts and about 15 percent waste.
Do I need to seal new concrete pavers?
Not immediately. Wait at least a season so the units dry and any efflorescence works out, then seal at $1 to $3 per square foot if you want stain protection.
How much sand goes between pavers?
Joint sand is swept in after compaction and again after a second pass. The joints should be full to just below the chamfer, not mounded over the surface.
Why are my pavers uneven after installation?
Usually a base that was not compacted in lifts, bedding sand that is too deep, or missing edge restraint. All three allow movement that the surface cannot absorb.
Sources
Some links are affiliate links.If you buy through them we may earn a commission at no extra cost to you. We do not accept payment for rankings. Read the full disclosure.