Paver Patio Installation: What It Involves
A step-by-step look at paver patio installation, from base prep and material costs to sealing and long-term care.
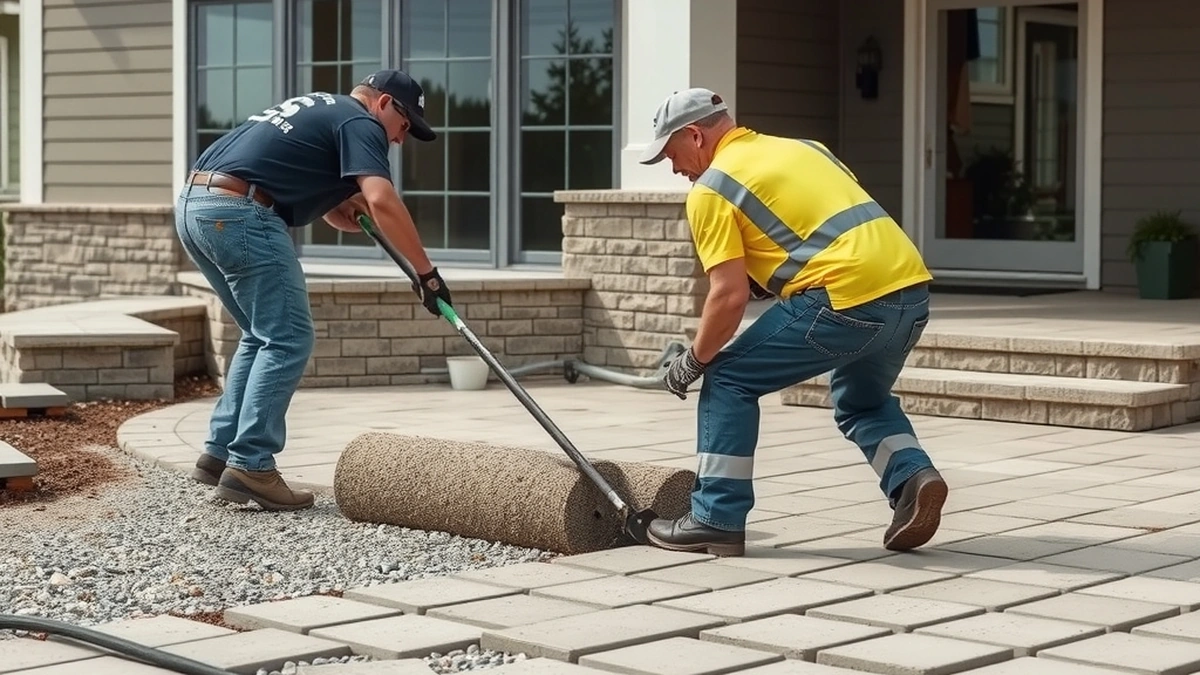
Paver patio installation means excavating, compacting a gravel base, setting bedding sand, laying pavers, and locking joints with sand—base work comes before the surface.
- Project focus
- Base preparation first, surface second
- Typical timeline
- 3 to 7 days for an average residential patio
- Material cost range
- $8 to $30 per square foot installed
- Sealing cost
- $1 to $3 per square foot
Some links on this page are affiliate links.If you buy through them we may earn a commission at no extra cost to you. We do not accept payment for rankings. Read the full disclosure.
Paver patio installation is the process of building a stable outdoor surface by preparing a compacted aggregate base, setting bedding sand, placing pavers in a pattern, and filling the joints. The defining rule is that base preparation comes before the surface. A patio is only as strong as the layers underneath the pavers.
What the Installation Process Involves
A standard paver patio installation follows a specific sequence. Skipping or rushing any step usually leads to settling, uneven surfaces, or drainage problems later.
- Planning and layout. Mark the patio area with stakes and string. Confirm the finished height and slope away from the house, typically a 1 to 2 percent grade for drainage.
- Excavation. Remove grass, topsoil, and organic material to the required depth. For a residential patio, total excavation depth often ranges from 7 to 9 inches, depending on base thickness and paver thickness.
- Base installation. Place crushed stone or aggregate in lifts, compacting each layer with a plate compactor. A common base is 4 to 6 inches of compacted gravel.
- Bedding sand. Spread 1 inch of concrete sand over the compacted base and screed it smooth. Do not compact the bedding sand before laying pavers.
- Paver placement. Lay pavers in the chosen pattern, keeping tight joints and checking for level as you go.
- Joint sand and compaction. Sweep fine sand into the joints, then compact the pavers into the bedding sand. Repeat sweeping and compacting until joints are full.
- Sealing (optional). Apply a paver sealer after the surface is clean and dry. Sealing costs roughly $1 to $3 per square foot.
Material Options and Installed Costs
Material choice drives most of the price variation. The figures below are estimates for installed cost per square foot and include base materials and labor.
| Paver type | Estimated installed cost per sq ft |
|---|---|
| Concrete pavers | $8 to $15 |
| Brick pavers | $10 to $20 |
| Travertine pavers | $15 to $30 |
| Permeable pavers | $12 to $25 |
For a 200-square-foot patio using concrete pavers at $12 per square foot, the material and installation estimate is:
200 sq ft × $12 = $2,400
Adding sealing at $2 per square foot adds:
200 sq ft × $2 = $400
Total estimated cost: $2,800
If the existing base needs repair before new pavers go down, base repair runs about $4 to $8 per square foot. For 200 square feet at $6 per square foot:
200 sq ft × $6 = $1,200
That brings the revised estimate to $4,000 for the example patio. These are estimates; actual quotes depend on site access, local labor rates, and design complexity. For more on pricing, see our breakdown at /paver-patio-cost-per-square-foot/ and the full cost guide at /how-much-does-paver-patio-cost/.
Why Base Preparation Comes First
The base carries the load. Patio furniture, foot traffic, and freeze-thaw cycles all place weight on the surface, and that weight transfers down through the bedding sand to the aggregate base. A poorly compacted base settles unevenly, which creates tripping hazards and cracks in the paver pattern.
Compaction happens in lifts. Rather than placing 6 inches of gravel and compacting once, installers place the aggregate in 2-inch layers and compact each layer separately. This removes air voids and reaches the density needed to support the pavers without shifting.
Drainage is part of base work too. The base and the finished paver surface should slope away from structures at about 1/4 inch per foot. On a 12-foot span, that equals a 3-inch drop from the house to the outer edge. Water that pools under or beside the patio can soften the base and cause settling over time.
Loads and Weight Considerations
Residential patios typically support foot traffic, patio tables, chairs, and grills. A standard patio set with four people might place several hundred pounds on a small area, but the load spreads across multiple pavers and the base below.
To show the scale, consider a 200-square-foot patio with a 6-inch compacted gravel base. The volume of base material is:
200 sq ft × 0.5 ft = 100 cubic feet
Crushed gravel weighs roughly 100 to 120 pounds per cubic foot. At 110 pounds per cubic foot:
100 cubic feet × 110 lbs = 11,000 pounds
That is about 5.5 tons of aggregate supporting the surface. The base must be compacted enough to hold that mass without rutting. Vehicle loads, such as a driveway crossing, require a thicker base and sometimes a geotextile fabric, but those details apply to driveways rather than standard patios.
Sealing and Ongoing Care
Sealing is optional but common. A sealer can reduce staining and make routine cleaning easier. It is not a substitute for good base preparation, and it will not fix a patio that settles because the base was inadequate.
If sealing, wait until the pavers are clean, dry, and fully settled—often a few weeks after installation. Reapplication intervals depend on the sealer type and exposure, but many residential patios are resealed every 3 to 5 years. Routine care includes sweeping, occasional rinsing, and re-sanding joints when sand washes out. More detail is available at /paver-patio-maintenance/.
When pavers shift, crack, or become uneven years later, the issue often traces back to the base or edge restraints. Repairs can involve lifting affected pavers, re-compacting or adding base material, and resetting the surface. See /paver-patio-repair/ for common failure patterns and how they are addressed.
DIY Versus Professional Installation
Homeowners with compacting equipment and experience can install a small paver patio, but the labor is significant. Excavation, hauling base material, and plate compaction are physically demanding. Mistakes in base depth or slope are difficult to correct after pavers are laid.
Professional installers bring equipment for large-scale compaction, lasers or string lines for slope, and experience with edge restraints that keep pavers from spreading. For a realistic look at what a self-install entails, see /diy-paver-patio/. For perspective on how long a well-built patio should last, see /how-long-does-paver-patio-last/.
Choosing Pavers vs. Other Surfaces
Pavers offer individual unit replacement and flexibility in pattern, but they require more base work than a poured concrete slab of the same size. Concrete slabs need less joint maintenance but can crack over time and are harder to repair in place. A direct comparison is available at /paver-patio-vs-concrete-patio/.
The right choice depends on budget, expected use, and whether you want the option to remove and reuse individual pavers later. Travertine and brick cost more than concrete, while permeable pavers cost more upfront but help with stormwater runoff where local rules encourage it.
What to Expect From Start to Finish
A typical residential paver patio takes several days to a week. Excavation and base work often consume half the timeline. Paver placement and joint sanding go faster, but sealing requires dry weather and curing time before the patio returns to regular use.
The most important takeaway is that the surface is only the finish layer. The excavation, aggregate base, bedding sand, and edge restraints determine whether the patio stays flat and drains well for years or develops problems after the first season. Base preparation first, surface second.
Next, compare how much does paver patio cost, paver patio repair, paver patio maintenance before you commit.
Frequently asked questions
What is the most important measurement?
Start with the ceiling or clearance number; it decides which systems can fit.
What does a typical project cost?
Costs vary by system and site access; the guide shows the line items and a planning range.
Can I install this myself?
Some tasks are DIY-friendly, but structural, electrical, and load-bearing work should be done by a licensed professional.
How long does installation take?
A simple setup is a weekend; a full build with electrical or structural work can take several weeks.
What should I check before buying?
Confirm dimensions, load ratings, and the manufacturer's installation requirements for your exact model.
Where can I find local help?
Ask a licensed contractor or installer who has worked with the same system and can inspect your site.
Sources
Some links are affiliate links.If you buy through them we may earn a commission at no extra cost to you. We do not accept payment for rankings. Read the full disclosure.