Clay Brick Installation: Sand-Set vs Mortar
Clay brick installation is usually sand-set over a compacted base. See pattern layout, cutting, joint width, compaction, and the mortar-set alternative.
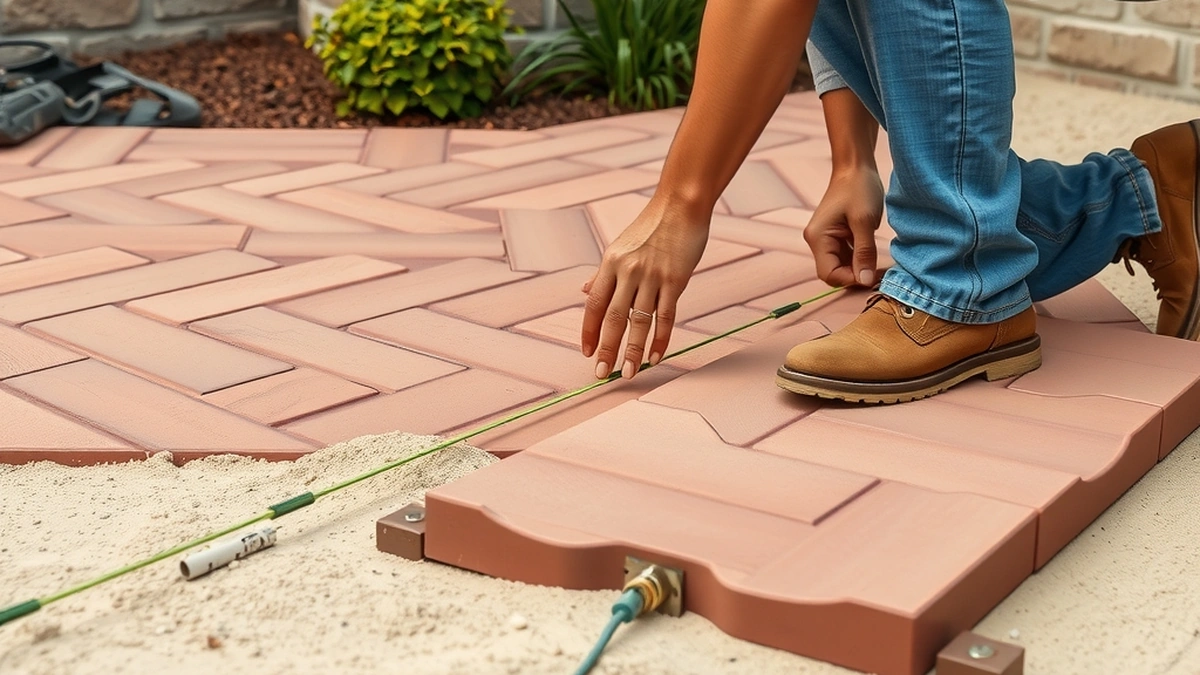
Clay brick installation is normally sand-set: compact 4 to 6 inches of base, screed an inch of sand, lay brick tight from a string line, cut the edges, pin restraint, compact, and fill the joints. Mortar-set is used over a concrete slab where the surface cannot flex.
- Base depth
- 4 - 6 in compacted
- Bedding sand
- 1 in
- Joint width
- 1/8 - 3/8 in
- Cutting waste
- 10 - 15 percent
- Installed cost
- $10 - $20 per sq ft
Some links on this page are affiliate links.If you buy through them we may earn a commission at no extra cost to you. We do not accept payment for rankings. Read the full disclosure.
Clay brick installation is mostly a base job with a bricklaying finish. The sequence is the same one used for concrete pavers — excavate, compact, screed sand, lay, cut, restrain, compact, sand the joints — but clay brings its own constraints: tighter joints, more chipping during cutting, and a real risk of efflorescence if the brick is sealed too early.
Sand-Set Versus Mortar-Set
Sand-set brick sits on an inch of bedding sand over compacted aggregate, with sand swept into the joints. The surface flexes slightly, drains through the joints, and can be taken apart and re-laid.
Mortar-set brick is bonded to a concrete slab with a mortar bed and pointed joints. It is rigid, it does not drain through the surface, and it inherits every crack in the slab beneath it.
| Aspect | Sand-set | Mortar-set |
|---|---|---|
| Base | 4 - 6 in compacted aggregate | Concrete slab |
| Movement | Flexible, minor | Rigid, cracks transfer |
| Drainage | Through joints | Surface only |
| Repair | Lift and reset | Chip out and re-bond |
| Best use | Patios, walks, driveways | Steps, porches, thresholds |
For a patio, sand-set is the default. Mortar-set makes sense at a step or a porch where a slab already exists and the surface must be rigid.
Base and Bedding
The base carries the load. Four to six inches of crushed aggregate, placed in 2- to 3-inch lifts and compacted each time, is the standard for foot traffic. Driveways take six to eight inches and a thicker brick.
Two details decide whether the base works:
- Aggregate type. Angular crushed stone with fines, not round gravel and not clean single-size stone.
- Slope. About 1 inch of fall per 4 feet away from the house, checked with a level before sand goes down.
Bedding sand is one inch, screeded to grade. Deeper sand compresses unevenly and lets brick rock. The full specification is in the paver base preparation guide.
Pattern and Layout
Clay brick patterns are older than concrete paver patterns and read differently on a house.
- Running bond is the simplest and fastest, with straight cuts at the edges.
- Herringbone at 45 or 90 degrees is the classic brick paving pattern. It locks tightly and suits high traffic, but every border needs angle cuts.
- Basketweave pairs bricks at right angles and gives a woven look with moderate cutting.
- Stack bond has no interlock and should not be used where anything heavier than a foot will cross.
Set string lines before laying. Two lines at right angles, checked with the 3-4-5 method, establish the field. A third line at the finished height establishes grade. Lay away from the line rather than toward it, so the field stays true.
Pattern affects the order: 10 percent waste for running bond, 15 percent for herringbone. On 300 square feet that is 330 to 345 square feet of brick.
Cutting Without Chipping
Clay brick chips at the arris — the corner edge — more than concrete does. The tool that prevents it is a wet saw with a diamond blade and a steady feed.
- Mark the cut on the face, not the edge.
- Cut face down when the pattern allows, so any chipping occurs on the hidden side.
- Do not force the feed. A slow pass produces a clean edge; speed produces spalls.
- For curved borders, mark each unit in place, number it, and cut to the mark.
- Keep a rubbing stone or a diamond pad handy to ease sharp cut edges.
Chips that remain visible are best replaced rather than hidden. A chipped corner in the middle of a field catches the eye every time you walk past it.
Joint Width and Laying
Clay brick joints run about 1/8 to 3/8 inch. The width is set by the pattern and by the spacers or string lines the installer uses.
Too tight and the units bind, chip against each other, and cannot accept sand. Too wide and the joint takes more sand, holds more water, and allows more movement. The correct width is consistent across the field — inconsistent joints are the clearest sign of an inexperienced hand.
Lay to a taut line and check the field every few rows with a straightedge. Small errors compound; a quarter inch of drift over twenty rows is a visible curve.
Compaction, Joint Sand, and Sealing
After laying and restraint, compact the field with a plate compactor fitted with a rubber pad. Then sweep joint sand in, compact again, and repeat until joints stay full just below the chamfer.
Clay brick often shows efflorescence in its first months as soluble salts migrate out. Let it happen. Brush the bloom off dry, keep the surface dry, and wait before sealing. Sealing over active efflorescence traps salt under the film and makes the bloom permanent until the sealer wears off.
Sealing itself runs $1 to $3 per square foot and is best done a season after installation. The paver sealing cost guide covers products and timing, and efflorescence covers removal.
The Installation Sequence
- Excavate to finished depth: brick plus 1 inch of sand plus compacted base.
- Compact the subgrade and place aggregate in 2- to 3-inch lifts.
- Compact each lift, check slope, and correct grade before proceeding.
- Screed one inch of bedding sand over the finished base.
- Set string lines and lay the field in the chosen pattern.
- Cut the perimeter, install edge restraint pinned into base, and compact.
- Sweep joint sand, compact again, and top up the joints.
What the Job Costs
Clay brick installation runs $10 to $20 per square foot. On 300 square feet that is 300 × $10 = $3,000 to 300 × $20 = $6,000. The brick is about $4 to $9 per square foot of that, or $1,200 to $2,700 on this area, with the rest in base, cutting, and labor.
Base repair, if the subgrade is soft or an old surface has to come out, adds $4 to $8 per square foot: 300 × $4 = $1,200 to 300 × $8 = $2,400. Sealing adds $300 to $900.
For the material math, see clay brick cost. For the broader brick budget, brick paver cost, and for the comparison against concrete units, clay brick versus concrete pavers.
Frequently asked questions
Should clay brick pavers be sand-set or mortar-set?
Sand-set over a compacted aggregate base is standard for patios and walkways because it flexes and drains. Mortar-set works over a sound concrete slab and is common on steps and porches.
How deep should the base be for brick pavers?
Four to six inches of compacted aggregate for foot traffic and six to eight inches for a driveway, measured after compaction, with an inch of bedding sand on top.
What is the right joint width for clay brick?
About 1/8 to 3/8 inch. Tighter joints bind and chip; wider joints take more sand and allow more movement. Match the width the pattern needs.
Can I cut clay brick with a circular saw?
A masonry blade in a circular saw will cut brick but chips the edges badly. A wet saw with a diamond blade gives clean cuts and less breakage.
Why does new brick have white powder on it?
Efflorescence, salts drawn to the surface as moisture evaporates. It is cosmetic on new brick and usually fades. Do not seal while it is active.
How long does a brick patio installation take?
Two to four working days for 300 square feet with a small crew: one day for excavation and base, one for laying, and part of a day each for cutting, restraint, and joints.
Sources
Some links are affiliate links.If you buy through them we may earn a commission at no extra cost to you. We do not accept payment for rankings. Read the full disclosure.