Paver Base Preparation: Depth and Compaction
Paver base preparation means 4 to 6 inches of compacted aggregate, placed in lifts and sloped to drain. See depth by use, gravel type, and compaction steps.
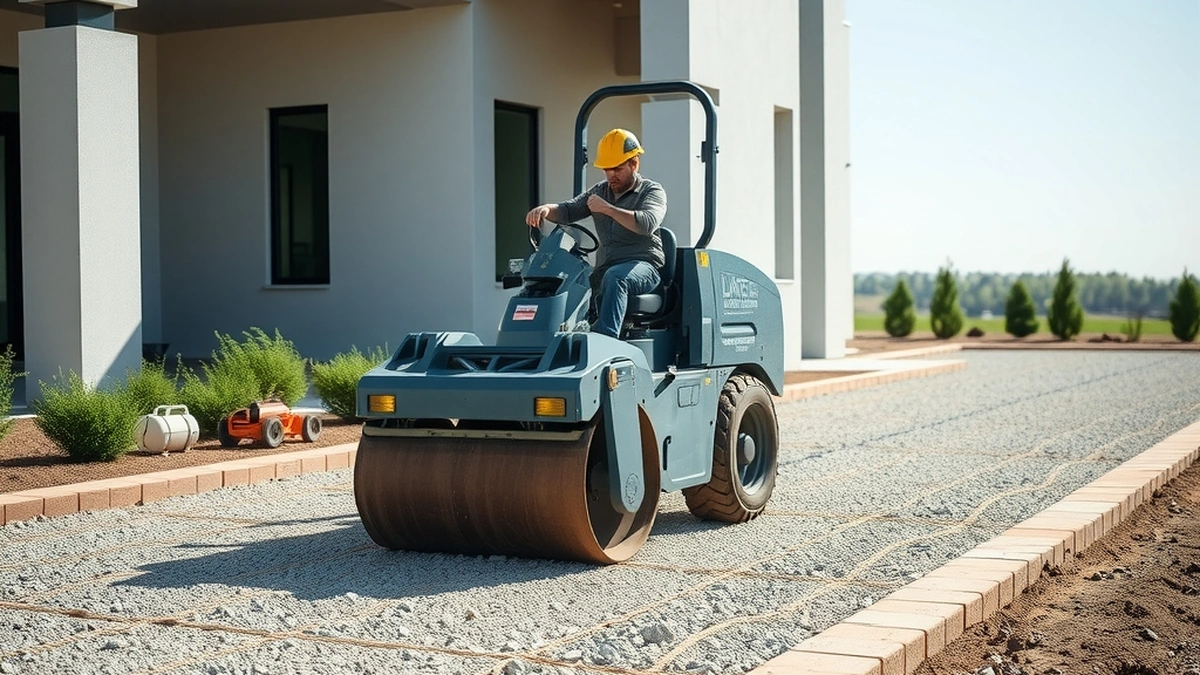
Paver base preparation is excavating to grade, placing 4 to 6 inches of crushed aggregate in 2-inch lifts, and compacting each lift before an inch of bedding sand goes down. The base carries the load and moves water; the pavers only cover it.
- Patio base depth
- 4 - 6 in compacted
- Driveway base depth
- 6 - 8 in compacted
- Lift thickness
- 2 - 3 in
- Surface slope
- 1 in per 4 ft
- Base repair if skipped
- $4 - $8 per sq ft
Some links on this page are affiliate links.If you buy through them we may earn a commission at no extra cost to you. We do not accept payment for rankings. Read the full disclosure.
Paver base preparation is the work of building the layer that carries the patio: excavate to grade, place 4 to 6 inches of crushed aggregate in thin lifts, compact each lift, then screed an inch of bedding sand on top. It is the step that decides whether the surface stays flat in five years. Everything visible above it is replaceable; the base is not.
What Base Preparation Actually Is
A paver surface is a load-distribution system. Each unit passes the load it receives down into bedding sand, then into aggregate, then into the subgrade. The aggregate spreads that load sideways so no single point carries too much.
Base preparation is the sequence that makes that system work:
- Remove topsoil and organic material to the required depth.
- Shape the subgrade and compact it.
- Place aggregate in lifts and compact each one.
- Check slope and grade as you go, not at the end.
- Screed bedding sand to a uniform depth.
Skip any one of those and the failure appears at the surface, where it looks like a paver problem and is not.
Depth by Use
| Surface | Compacted base | Paver thickness |
|---|---|---|
| Walkway, foot traffic only | 4 in | 60 mm (2-3/8 in) |
| Patio, foot traffic | 4 - 6 in | 60 mm |
| Driveway, cars and light trucks | 6 - 8 in | 80 mm (3-1/8 in) |
| Permeable surface | 6 - 12 in open-graded | 80 mm, open joints |
Depth is measured after compaction. Six inches of loose aggregate compacts to roughly five, so the excavation has to account for that loss plus the paver thickness and the bedding sand. A patio finished level with the lawn needs a hole about 9 to 10 inches deep: 6 inches of base, 1 inch of sand, and a 2-3/8 inch paver, plus the compaction loss.
For a 300-square-foot patio at 6 inches, the aggregate volume is 300 × 0.5 = 150 cubic feet, or 150 ÷ 27 = 5.6 cubic yards before allowing for compaction and waste. Order 6 to 6.5 yards and you will not run short at the last corner.
Gravel Type Matters More Than Depth
The right material is crushed stone with angular faces and a spread of sizes, often sold as road base, class 5, or 21A depending on the region. The fines fill the voids between larger stones, and the angular faces lock when vibrated.
Wrong choices show up quickly:
- Round river gravel rolls instead of locking and lets the surface shift.
- Clean single-size stone drains well but has no fines to bind it, so it stays loose.
- Sand alone compacts to a firm-looking surface that pumps and migrates under load.
- Fill dirt or topsoil compacts to something that feels solid in dry weather and turns to mush when wet.
For a permeable paver system, the specification reverses: the base is open-graded, washed stone with no fines, because infiltration is the point. Using standard road base under permeable pavers clogs the system and defeats the reason for buying them.
Compaction in Lifts
Compaction is where most DIY bases fail. A plate compactor reaches about 2 to 3 inches of material. Dumping 6 inches and running over it once leaves the bottom loose, and that loose layer consolidates under the first wet season.
The sequence is:
- Place 2 to 3 inches of aggregate.
- Compact with a plate compactor, two to three passes, overlapping each pass.
- Mist lightly if the material is dusty and will not lock.
- Add the next lift and repeat until the base reaches grade.
- Compact the finished surface again after final grading.
A vibratory plate is adequate for a patio. For a driveway, a heavier plate or a roller does the work faster and reaches deeper. Moisture helps: bone-dry aggregate stays loose, and soaked aggregate moves under the plate. Damp, not wet, is the target.
Slope and Drainage
Every paver surface needs fall. The common specification is 1 inch per 4 feet, about 2 percent, directed away from the house and toward a place water can leave the site.
Two mistakes are common. The first is a slope that is too flat, which shows up as shallow ponding a day after rain. The second is a slope that is correct in the middle of the patio and reverses at the edge because the base was screeded against a string line that sagged.
Set string lines at the finished paver height, check them with a level, and verify the fall with a straightedge at several points before sand goes down. Correcting grade after the pavers are laid means lifting the whole field. The drainage and pooling guide covers what happens when the fall is wrong and how it is fixed.
What a Bad Base Costs Later
Base repair runs $4 to $8 per square foot. On a 300-square-foot patio that is 300 × $4 = $1,200 to 300 × $8 = $2,400, which can exceed the entire paver cost of 300 × $8 = $2,400 to 300 × $15 = $4,500.
That arithmetic explains the order of priorities in this guide. A cheap paver on a correct base outperforms an expensive paver on a bad one, every time. The settling repair guide shows how the failure is diagnosed, and paver repair cost shows what the fix costs at different scopes.
Bedding Sand and Edge Restraint
On top of the compacted base goes one inch of coarse bedding sand, screeded to the final grade. It is a setting bed, not a structural layer. Deeper sand compresses unevenly and lets pavers rock.
Edge restraint is part of base preparation, not an afterthought. A plastic or aluminum edge pinned into the base holds the field tight, and without it the perimeter spreads outward one row at a time. The restraint has to sit on the compacted base, not on loose soil.
Inspecting the Work Before Pavers Land
- Check the excavated depth against the finished height you want.
- Confirm the aggregate type by looking at it: angular, graded, no rounded stones.
- Watch a lift being compacted. If the crew dumps the full depth at once, stop them.
- Test the base with a screwdriver. It should resist penetration.
- Check the slope with a 4-foot level at three or four points.
- Confirm edge restraint is pinned into base, not soil.
For the rest of the build, see concrete pavers installation and paver patio installation. For the material budget that sits on top of this base, see concrete pavers cost.
Frequently asked questions
How deep should a paver base be?
Four to six inches of compacted aggregate for a patio or walkway, and six to eight inches for a driveway. The depth is measured after compaction, not before.
What kind of gravel goes under pavers?
Crushed stone with angular faces and a mix of sizes, often sold as road base or class 5. Round river gravel does not lock together and should not be used.
How thick should each base lift be?
Two to three inches before compaction. Thicker lifts trap loose material at the bottom that a plate compactor cannot reach, and the surface settles later.
Do I need fabric under a paver base?
A geotextile separator is worth it on soft or clay subgrade. It keeps fine soil from pumping up into the aggregate, which preserves drainage and strength.
How much slope does a paver patio need?
About 1 inch of fall per 4 feet, roughly 2 percent, away from the house. Less than that and water ponds; much more and the surface feels tilted.
What happens if the base is not compacted?
The pavers settle unevenly within a season or two, joints open, and water collects in the low spots. Correcting it later costs $4 to $8 per square foot.
Sources
Some links are affiliate links.If you buy through them we may earn a commission at no extra cost to you. We do not accept payment for rankings. Read the full disclosure.